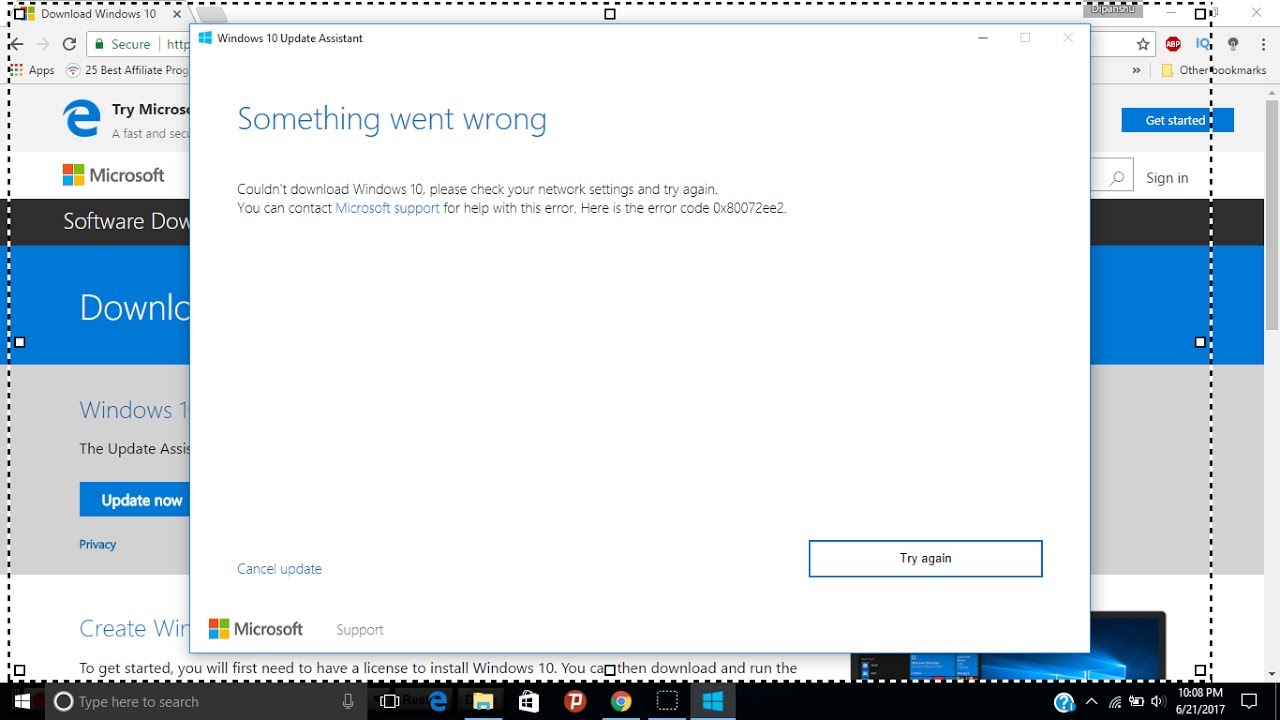
 A good deal of users locate Windows 10 a trustworthy operating system. But, it is now notorious for various update problems. From time to time, distinct upgrade errors often appear, leaving users frustrated. Sometimes, these issues even seem more than once. Among the most typical Windows Update problems you may encounter is the mistake 0x80072ee7. There are a variety of situations where this could happen. But, it generally shows up if an individual is attempting to put in a significant Windows 10 upgrade such as the Creators Update or the Anniversary Update. Discover how to troubleshoot Windows 10 update error 0x80072ee7 If you have recently encountered this issue, you need to immediately address it and find out how to repair error code 0x80072ee7 from Windows 10. Do not worry because we have prepared a list of alternatives which could help you solve this matter. But before we dive into this, it'd be perfect if we have a good look in the mistake 0x80072ee7. Let us discuss a few of the typical situations that users have previously reported. This manner, you can repair the problem and keep it from occurring again. 0x80072ee7 Windows Update -- In case you are attempting to set up a Windows upgrade, this error code will appear. You need to make sure that all of the essential services are operating correctly. You might even attempt to reset the professional services by conducting a Windows Update reset script. Code 0x80072ee7 Windows 10 Store -- This error code may also appear whenever you're accessing Windows Store. This may have something to do with files that are corrupted. Update error 0x80072ee7 on Windows 10 -- In some circumstances, the error also appears when the consumer is attempting to update their Windows system to the most recent version. It's likely that a third party antivirus application is causing this. It'd be best to disable the program or disable it. Ensure that you try our approaches below. They work well on Windows 10, however they are also applicable to older program versions like Windows 8.1 and Windows 7. Windows 10 Media Creation Tool mistake 0x80072ee7 -- The issue may also appear when you are using Media Creation Tool. You can correct this by editing hosts record. Strategy 1: Changing the DNS server address Users in the area forums from Microsoft's website mentioned that among the greatest solutions to this malfunction 0x80072ee7 is altering the DNS host address. Thus, let us try that workaround first. Here are the steps You Need to follow:
For Alternative DNS Server -- 8.8.4.4 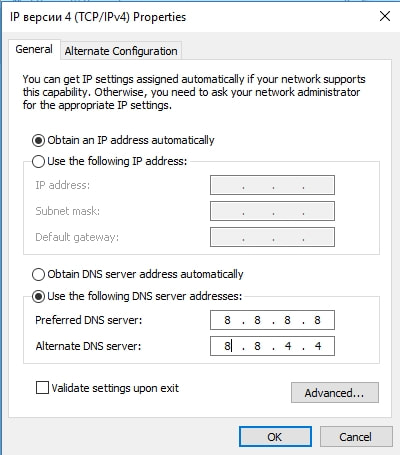
Method 2: Launch an SFC scan Windows 10 and older program versions such as Windows 8.1 and Windows 7 possess an integrated tool which describes and fixes mistakes. It's possible to conduct an SFC scan, and the procedure will check your PC for potential troubles. Consequently, if you would like to troubleshoot Windows 10 update malfunction 0x80072ee7, then you ought to benefit from the tool. Here are the steps you need to do to Execute an SFC scan:
If the error persists, you can try conducting a DISM scan. You can do this by launch Command Prompt (Admin) and pasting the command under: DISM /Online /Cleanup-Image /RestoreHealth Just wait till the scan is complete. After that, consider upgrading Windows 10 again and check whether the error is now gone. Strategy 3: Running the WUReset script You're able to solve Windows 10 upgrade issues using the WUReset script. This custom does is automate frequent workarounds for mistakes, such as deleting the SoftwareDistribution folder and simplifying the Windows Update procedure, amongst others. You would not need to execute such activities on your own, letting you save time and energy. Just look for the script online and follow the directions about the best way best to utilize it. Strategy 4: Assessing the hosts file It's also feasible that the hosts file was changed, causing the mistake 0x80072ee7 to look. There are users that reported they had discovered 0.0.0.0 IP addresses within their hosts file. You can correct it by removing the speeches or scanning the # symbol at the start of the line. It's also worth noting that you ought to take some care when changing the hosts file. The procedure can be hard and might cause other issues. Method 5: Assessing the preferences of your antivirus tool Sometimes, an individual's anti-virus tool might interfere with the system upgrade, causing the mistake 0x80072ee7 to look. You may correct this issue by highlighting particular features in your safety program. It is possible to examine your anti-virus tool's anti virus and turn off it. If this does not correct the problem, it would be a good idea to completely disable the app. If you removed the mistake by disabling your antivirus software, then it'd be best to change to another brand. We highly suggest using Auslogics Anti-Malware. What is great about this particular tool is that it supplies a detailed protection for your personal computer, detecting attacks and threats that you would never guess existed. What is more, it's designed to be compatible with Windows 10. This usually means it will not interfere with your most important anti virus. Thus, it is possible to eventually upgrade your system while using the security you want. Method 6: Shifting registry permissions It's also possible your registry hasn't been correctly configured, causing the mistake 0x80072ee7 to appear. You can resolve this issue by altering certain permissions from the registry. Just follow the directions below.
0 Comments
 Now, upgrade errors are a frequent sight for Windows users. In older versions of this system, individuals are able to use unique techniques to disable the upgrades. But with Windows 10, there's just small you can do to block the procedure. The smartest choice you have would be to postpone the setup.
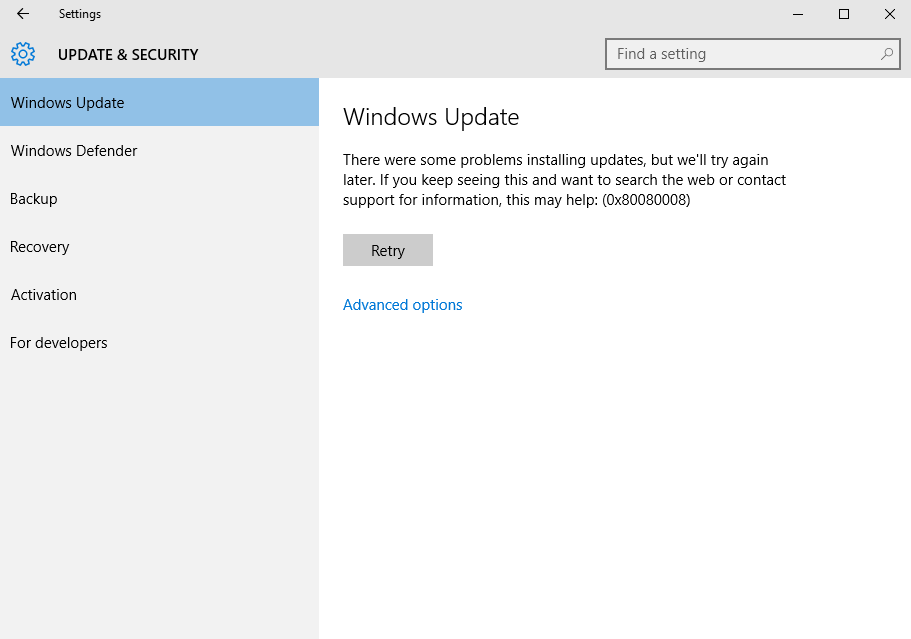
Among the recurring upgrade errors is that the one using all the code 0x80080008. When you find this error code, then you'll discover that the upgrade procedure becomes stuck or a few of the documents aren't successfully downloaded and installed. If you would like to understand how to mend Windows 10 upgrade error 0x80080008, you are in luck. In the following guide, we'll talk about a number of the greatest workarounds for this situation. While our options work great for Windows 10, they're also useful for older programs such as Windows 8, Windows 8.1, and Windows 7. Frequent Scenarios Associated with the Error 0x80080008 Before we know how to mend Windows 10 upgrade mistake 0x80080008, it'd be best when we speak about a number of the typical problems associated with it. This manner, you may acquire a clearer idea of how to avoid the error from occurring . Windows upgrade failed -- The mistake 0x80080008 can trigger the upgrades to quit functioning. You ought to be able to solve this problem by disabling your third party anti virus. A fantastic workaround is to manually download the upgrades. We'll go over these options below. 0x80080008 Server 2016 -- A great deal of consumers reported issues using Windows Server 2016. Our methods are intended to solve the mistake 0x80080008 on Windows 10, but a number of them should use to Windows 2016. Method 1: Disabling your own Anti-Virus Some users reported that the upgrade mistake 0x80080008 can appear because of issues with third party antivirus applications. In case you've got one, consider disabling it and check when the upgrade will push . But if this does not work, we advocate eliminating your anti-virus completely. Whether this solution eliminates this error, then it's about time you switched into another security instrument. Method 2: Performing SFC and DISM Scans In case the mistake 0x80080008 keeps on coming back, then there has to be something wrong with your setup. It's likely that there are corrupted or damaged system files on your PC. Luckily, this is readily fixed by doing an SFC scan. You can do this by following these steps:
When the DISM scan can not get the documents on the web, you may employ your installation media. Add your USB flash drive or DVD, then run the following command: DISM.exe// Online /Cleanup-Image /RestoreHealth /Supply:C:\RepairSourceWindows /LimitAccess Do not replace'C:\RepairSourceWindows' along with your USB flash drive or DVD's path. After the scanning is finished, check whether the error persists. Method 3: Easily downloading the upgrade In case the mistake 0x80080008 is obstructing the upgrade procedure, among the perfect workarounds is to manually download and install the elements. You can do this by following these steps:
Method 4: Restarting BITS solutions Windows updates are installed with the assistance of many services, such as the Background Intelligent Transfer Service (BITS). Sometimes, this service may crash and keep you from finishing the upgrade procedure. What you would need to do is restart the ceremony. Simply follow the steps below:
Method 5: Utilizing Safe Boot mode It's possible for particular background procedures to slow down or perhaps interfere with an upgrade. You may try to tweak your providers to make sure that nothing will battle with the upgrade. To do that, follow these directions:
 Windows 10 is among the most operating systems on the planet these days. But exactly like any OS, in addition, it has its myriads of problems. Inside this guide, we are going to discuss mistake 0x80071a91 and how to repair it. Windows 10 malfunction 0x80071a91 is a mistake which happens on largely Windows 10 PC following recent updates from reduced Windows versions like Windows 7 and Windows 8. Error 0x80071a91 prevents users from downloading and installing Windows upgrades. We can state that Windows 10 inherited this error code from Windows 8.1. As we reported in a prior article, mistake 0x80071a91 is among the most ordinary Windows 8.1 error codes. Inability to set up latest Windows patches expose Windows PC to newest threats and safety loopholes; thus, making this mistake issue a necessity to fix. Corrupt system drivers, corrupted Windows OS setup, and Windows Updates problems are a few of the factors responsible for activating Windows 10 malfunction 0x80071a91. Thus, we've enjoyed working options geared towards repairing the mistake problem once and for all. How can I fix Windows 10 error 0x80071a91? 1. Run a Complete system scan Malware and viruses may creep up in your Windows PC and corrupted significant system drivers; therefore, you encounter Windows 10 mistake 0x80071a91 issue. We strongly suggest that you utilize Malware bytes AdwCleaner-a malware removal software to remove all malware in the Windows PC. Follow the following steps install, download, and utilize MalwarebytesAdwCleaner in your own Windows PC:
2. Install Microsoft Hotfix Some Windows users could fix Windows 10 mistake 0x80071a91 using Microsoft Hotfix. Here is the way to do so:
3. Run the Windows Update troubleshooter A newer variant of Windows 10 or Windows 10 Creators Update includes Windows Update Tracking tool. Since Windows 10 mistake 0x80071a91 is connected to Windows upgrade; hence you have to use Windows Update troubleshooter. Although, you Might Not Be certain about how to use this troubleshooter in Windows 10, simply follow the instructions below:
4. Run System Restore in safe mode Here is the Way to run system restore:
Roll Back into Windows 8.1/7 Latest update from Windows 7/8/8.1 into Windows 10 may also cause Windows 10 malfunction 0x80071a91. For this reason, you may want to downgrade your Windows OS back to its own previous OS. Note : But you might need to input'Safe Mode' to be able to downgrade. This is the Way to roll back your Windows OS:
Note: A complete Windows.old file (saved in C:Windows.old) is your important precondition for the downgrade. 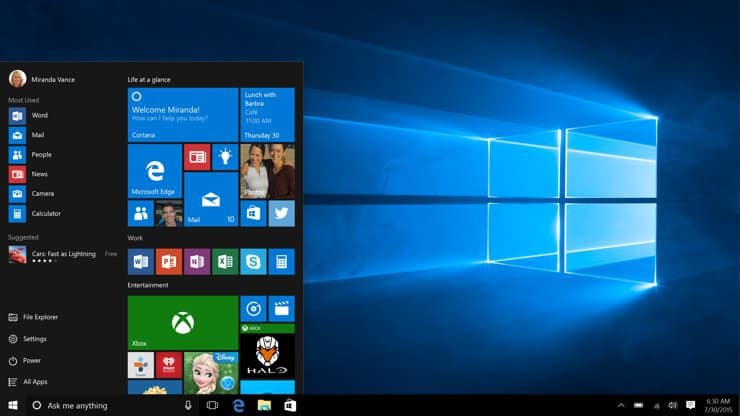 Start Menu is among the most useful elements of Windows 10 since it enables us to immediately access installed programs and preferences. Many users reported "Critical Error -- Start menu not working" message on Windows 10, and in case you've got exactly the exact same problem, you may wish a nearer look at out options. Your user experience cans affect. Speaking of issues, users reported that the following problems with their Start Menu:
Option 1: Input Safe Mode Critical Error -- Start menu not working can be very troublesome, but users assert this mistake can be repaired by inputting the Safe Mode. To enter Safe Mode, do the following:
Option 2: Uninstall Dropbox / your anti virus software Many users reported Dropbox as the primary culprit for Critical Error -- Start menu not working mistake. To be able to repair this problem, you need to eliminate Dropbox from your PC. To do that, follow these steps:
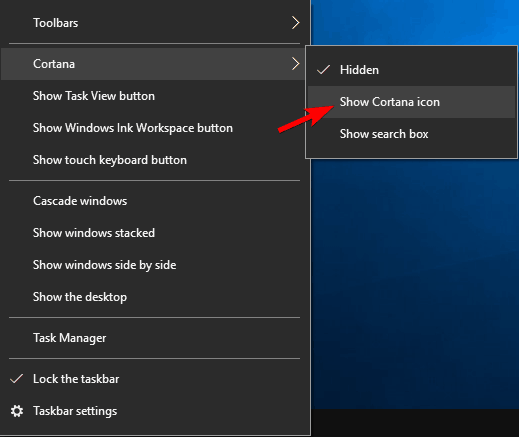
Few users reported that specific antivirus software, like Symantec or Avast, may cause difficulties with Windows 10 and Start Menu, so if you are having this issue, try removing your antivirus software. Option 3: Immediately hide Cortana out of Taskbar Few users reported that concealing the Cortana icon in the Taskbar fixes this difficulties. To Be Able to conceal Cortana, you Want to do the following:

How Fix WerFault.exe Application Error 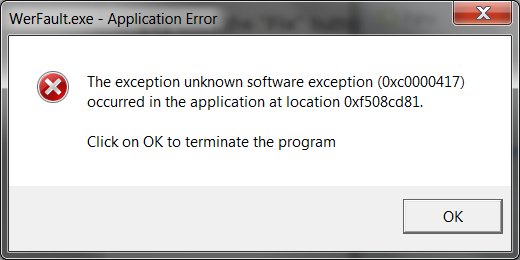 In case you've gotten a WerMgr.exe or WerFault.exe Application Error using Windows 10, then you've landed at the ideal location. This report compiles all of the approaches to repair. WerFault.exe or WerMgr.exe Application Error in Windows 10. The WerMgr.exe is situated in system32 folder in windows operating system and can be utilized for windows error coverage. The error below reveals these files are corrupt and had to be repaired. The instruction at the referenced memory could not read. Click on OK to terminate the program. Method 1 – Run SFC System File Scanner
Method 2 – Use Windows Memory Diagnostic Tool
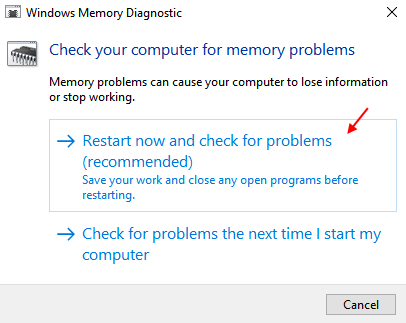 This instrument will operate and then will detect and fix mechanically the memory associated issues in windows operating system. Method 3 – Disable Windows Error Reporting Service If the preceding two approaches don't operate, then the ideal choice is to disable windows error reporting support.
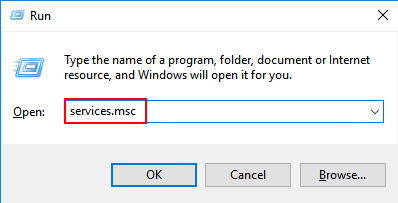 3. Today, find windows error reporting agency in the listing. 4. Double click it. 5. Now, select startup kind as handicapped . 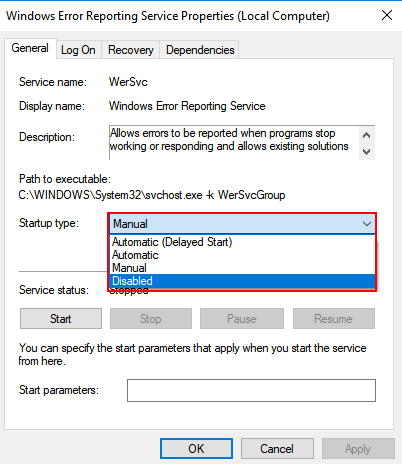 6. Now, click apply. 7. Finally press OK and reboot your own PC. Method 4 – Reinstall Display Drivers 1. Press and maintain windows crucial and then press on R to start run control box. 2. Then kind devmgmt.msc inside and sexy input. 3. After the device manager opens click Screen adaptors to enlarge. 4. Now, uninstall drivers. 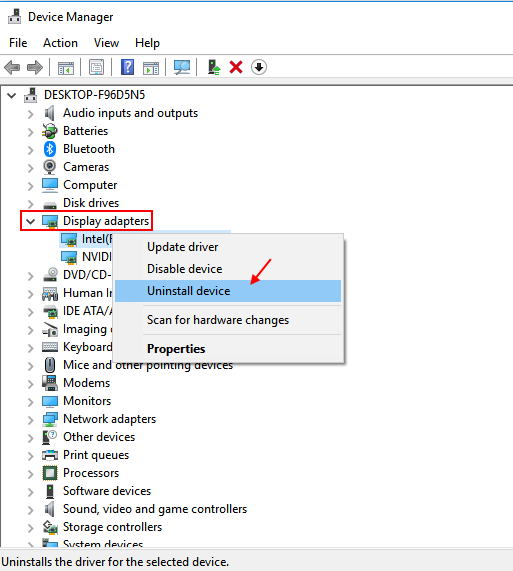 5. Today, Click Action tab. 6. Finally, click Scan for hardware changes. After, you click scan for hardware changes, the Device manager will automatically set up the most recent missing hardware together with the updated version, which you recently flashed today. |
